So you’ve decided to start playing around with Amazon Web Services and are worried about doing so securely. Here’s the basics to do when you set up to ensure you’re on sound footing. In fact, I’m going to use the free tier of all these items for this walkthrough, so feel free and do it yourself if you’ve never taken the plunge into AWS!
Account Setup
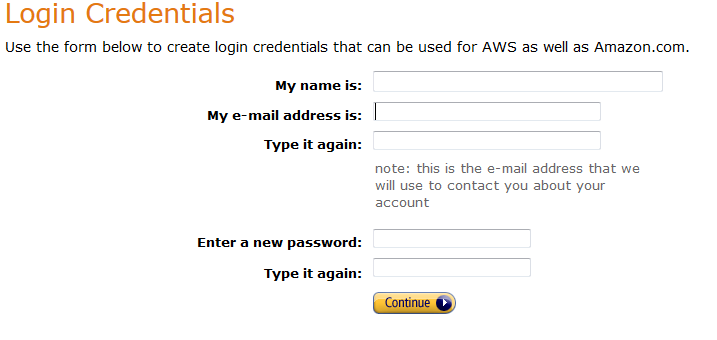
Signing up for Amazon Web Services is as simple as going to aws.amazon.com and clicking the “Sign Up” button.

It will want a password – choose a strong one, obviously – and some credit card info for if you exceed the free tier. It’ll want a phone number for a robot to call you – they show you a PIN, the robot calls you, you give the robot the PIN, and you’re good to go.
Multifactor Authentication Setup For Your Account
Next, set up multifactor authentication (MFA) for your Amazon account. You should see an option like this to go directly there immediately post signup, or you can pick the “IAM” section out of the main Amazon console.

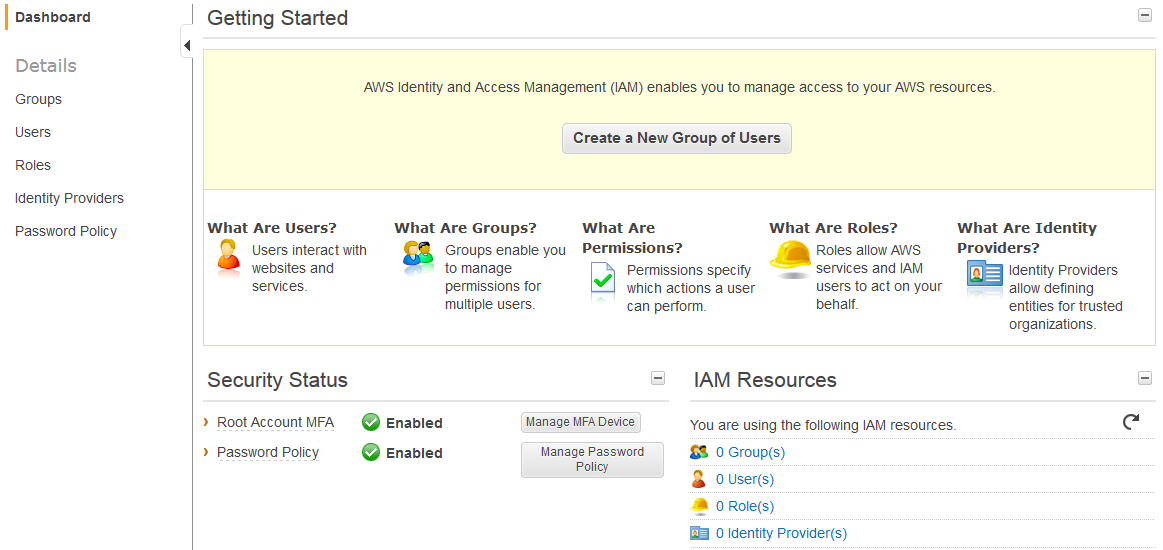
When you go to the IAM console you’ll see two options under Security Status to turn on – Root Account MFA and Password Policy. I won’t talk much about the password policy except to say “go turn it on and check all the boxes to ensure strong passwords.” To turn on MFA, you need some kind of MFA device. The Amazon docs to walk you through the process are here. Unless you have a Gemalto hardware token already your best best is to just download Google Authenticator (GA) onto your iPhone/Android from the relevant app store (other choices here).

Once you’ve installed Google Authenticator, click on “Manage MFA Device” and choose virtual; it’ll show you a QR code that GA can scan to do the setup. Then you enter two tokens in a row from GA and it’s hooked up to the account. Now, to log into the console you need both your password and a MFA token. (You can also use GA for Dropbox, Evernote, Gmail, WordPress, etc. and is a good safeguard against the inevitable password losses these companies sometimes have.) Of course once you do this you need to be careful – if you lose the phone or device you can’t get in!
Now make sure and save all your credentials in a password vault. I prefer Keepass Password Safe along with MiniKeePass on the iPhone. Besides the password, you should go to your Security Credentials (off a popdown form your name in the top right) and store your AWS Account ID, Canonical User ID (used for S3), and any access keys or X.509 certificates you make – but it’s better not to make these for the main account, just for IAM accounts. Proceed onward to hear more about that!
Identity and Access Management Setup
All right – now your main login is secure. But you want to take another step past this, which is setting up an Identity and Access Management (IAM) account. IAM used to be a lot less robustly supported in AWS but they’ve gotten it to be pretty pervasive across all their services now. Here’s the grid of what services support IAM and how. You can think of this as the cloud analogy to UNIX’s “secure your root account, but still you shouldn’t log in as it but as a more restricted user.”
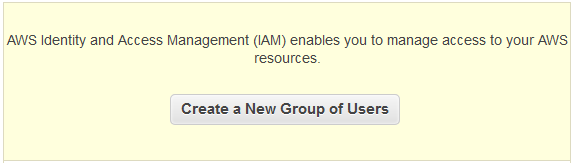
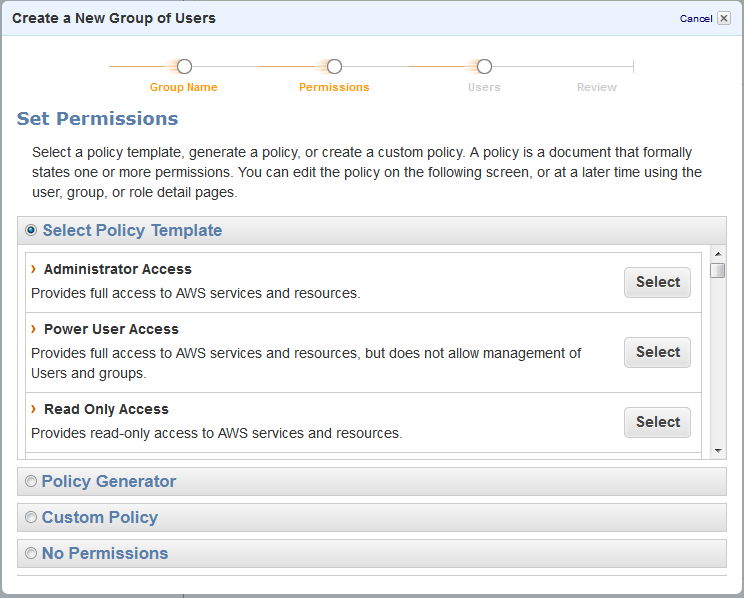
First, you have to set up a group. On the IAM dashboard click on the big ol’ “Create A New Group Of Users” button in the yellow box at the top.

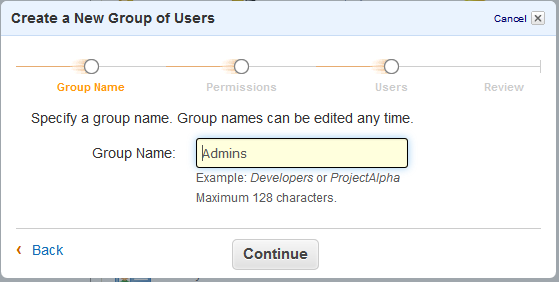
Then make a group, call it “Admins” for the sake of argument.

Choose the “Administrator Access” policy template. If you know what you’re doing, you can change this up extensively.

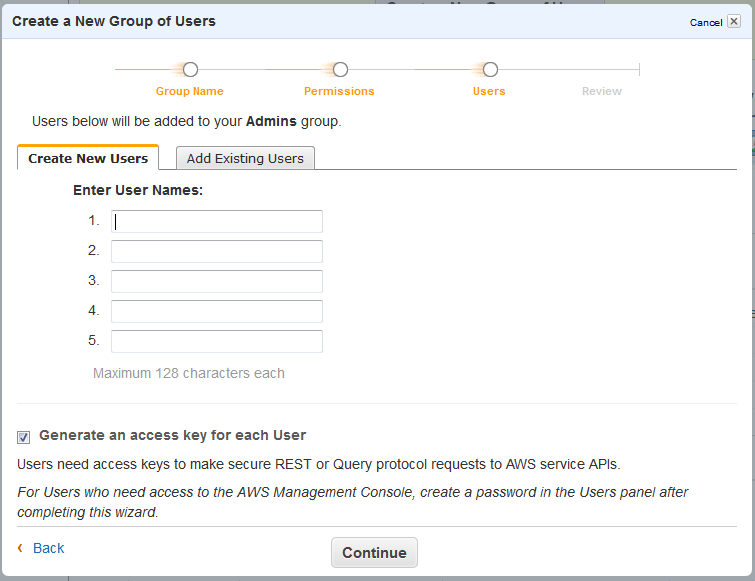
Add a username for yourself (and whatever other people or entities you want to have full admin access, ideally not a long list) to the group.

For each user it’ll give an Access Key ID and Secret Access Key – these are the private credentials for that user, they should take them and put them in whatever password vault they use.
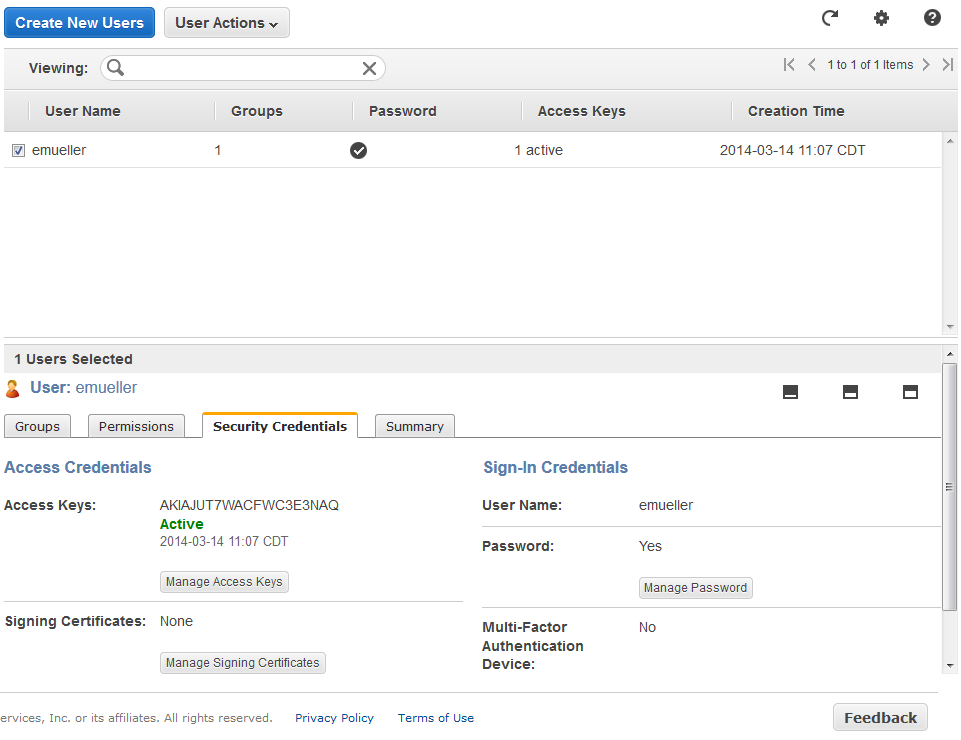
If you want to use that account to log into the console – and for this first one, you probably do – then once this is complete you go into Users, select the user, and under Sign-In Credentials it will say Password: No. Click Manage Password and set a password for that user; they can then log into the custom IAM login URL shown on the front page of the IAM dashboard (it’ll put it in the file when you Download Credentials, too).

MFA Setup for IAM
Just as with the main user, you can (and should) also set up MFA on IAM users. It’s the same process as with the main account so I won’t belabor it.
After you set up your IAM user and its MFA, you shouldn’t log in using your main AWS account credentials to do work – only if you need the enhanced access to mess with account credentials. Log out and then back in with your IAM account to proceed. If you want to take it a step farther and make an even less privileged account without admin rights, which you can use for everyday tasks like logging in and looking at state or just starting/stopping instances but not manipulating more sensitive functions, you can do that too.
More IAM
Of course if you are looking to manage multiple people, or separate apps that have access to your account (many SaaS solutions that integrate with your Amazon account will ask for IAM credentials with specific access), you can set up more groups with less access and have those entities use those. In general I’d suggest using a group+user and not just a user (different SaaS monitoring services recommend different approaches, but I think a plain user is less flexible). You can also get fancy with roles (used for app access from your instances) and identity providers. Remember the principle of least privilege – give things only as much access as they need, so that if those credentials are compromised there’s a limit to what they can do. There’s an AWS IAM best practices guide with more tips.
Turn On Accounting
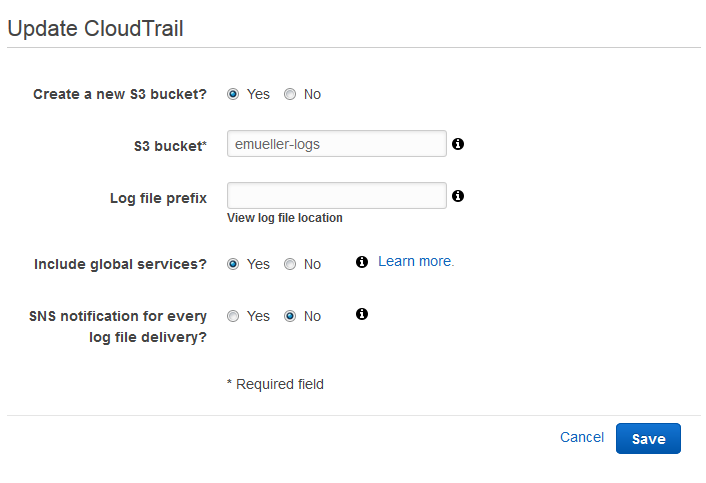
Security folks know that nothing’s complete without the ability to audit it. Well, you can turn on logging of AWS security events using CloudTrail, the AWS logging service. This will basically dump IAM (and other Amazon API events) to a JSON file in S3. This is a whole can of whupass unto itself, but the short form is to follow this guide to set up your trail, making sure to say Yes to “Include global services?”.

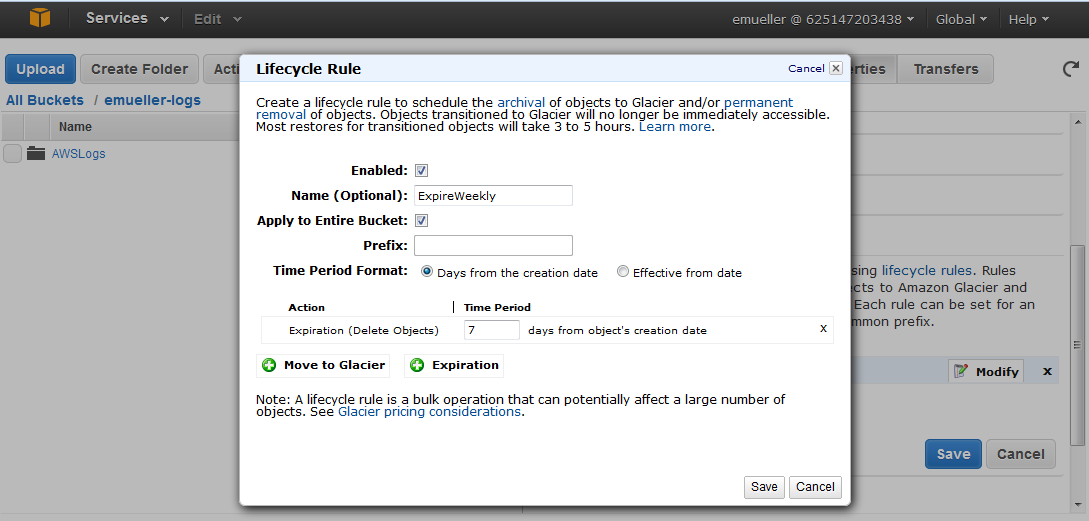
You can also go into S3 and set your bucket (properties.. lifecycle) to expire (archive, delete, etc.) the logs after a certain time.

Then you can do something like set up SumoLogic to watch it and review/alert on your logs. If you want to try that, the short HOWTO is:
- Sign up for Sumo free trial (need a non-gmail email account)
- Add a sumo IAM group with permissions to get to your CloudTrail S3 bucket (there’s suggested JSON with the exact settings in the Sumo help) and a user in that group
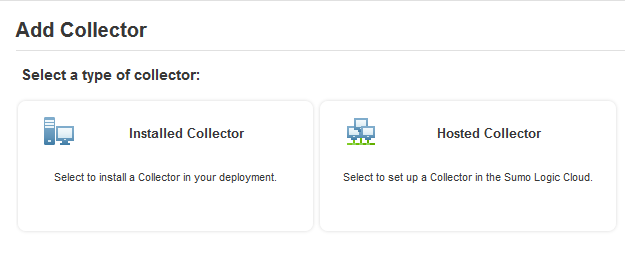
- Add a hosted collector

- Add a S3 source to that collector, point it at your bucket, give it the sumo user’s AWS creds
- Your data’s going to come in in big clumps of JSON though, which you can parse with some pain. Hint, your searches chould look like:
* | json “userIdentity.userName”, “eventTime”, “eventName” as username, time, action | sort by time
They also have an app specific to CloudTrail; you have to contact Sumo support to get it turned on though.
Network Setup
All of this, of course, is about access at the Amazon account and API level. For your actual instances, you’ll want to set up secure network access and then manage the SSH keys you use to log into them.
VPCs used to be a limited option, and mostly people just used security groups. Nowadays, VPCs are standard and an expected part of your setup. They’re like a private virtual network. When you create your account, it’ll actually create one default one for you automatically. You can see it by going to the VPC Console. This default VPC, though, is set up for convenience and back compatibility – instances you launch into it will get a public IP address, which may not be what you want, and the default security group allows all outbound traffic and all traffic from within the security group.
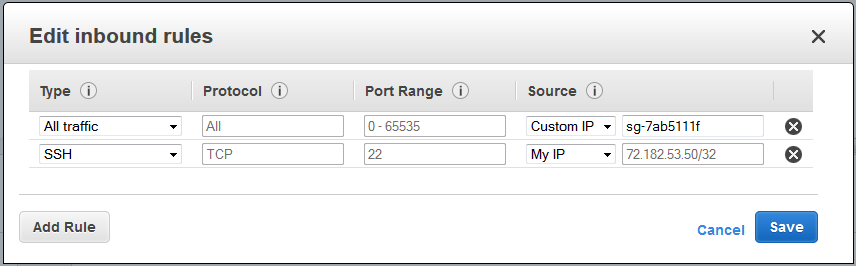
You should consider starting one instance this way and then using it as a bastion host to gateway into your other instances, which shouldn’t have public IPs unless you really want them to be publicly facing. It’s hard to prescribe other specifics here because it really depends on what you plan to do. At a bare minimum you need to add an inbound SSH rule from your location to the security group so you can log into your first instance when you start it below. (They have a neat new “My IP” choice that’ll detect where you’re coming from. Of course that won’t work when you drive to the Starbucks…) Consider removing the rule allowing all traffic from within a security group – even within a group it’s more secure to allow specific protocols instead of “everything from everywhere.”

Ideally, you’d set up a VPN to the VPC’s Internet Gateway – but this requires expensive hardware or setting up your own server and is way out of scope here.
System Setup
Then, of course, you finally get to starting instances! Each instance will start with a default root ssh key. Things you want to do here are:
- You will want to use personal SSH keys to log in. Generate a public-private pair (using putty-keygen or whatever’s best for your client). This doc tells you how to upload the public key to AWS. This will start any instance with that public key as root (or ec2-user or other non-root username depending on the distro you’re using), so this is a pretty sensitive root credential. You can add more users and distribute more keys to the instances later either via your favorite CM tool, by using AWS OpsWorks which is based on Chef, or however else.
- Start an instance in the EC2 section of the console into your default VPC/sec group/etc. using your uploaded public key. I’m not going to do a detailed HOWTO on this because it’s pretty well-trod ground. If you don’t have an opinion, start with Amazon Linux.
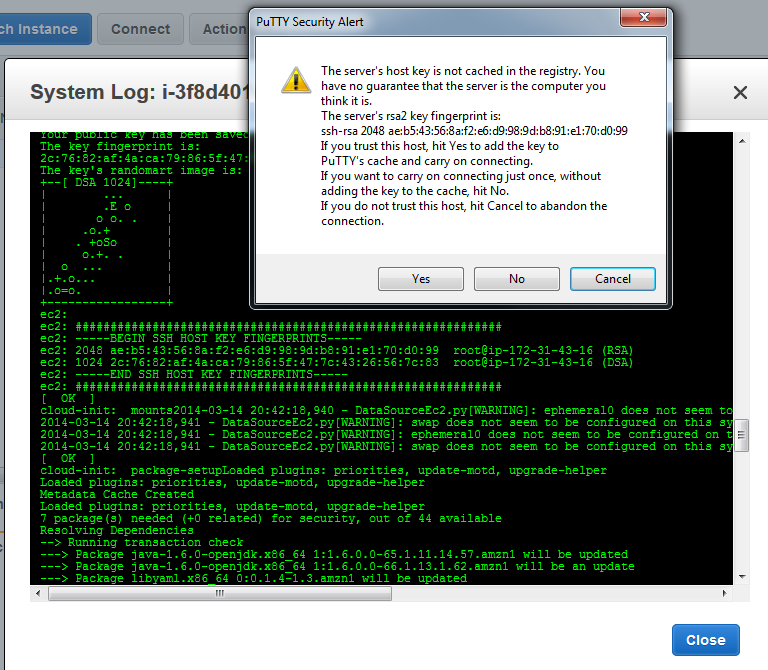
- Log in using your private key. Check the SSH fingerprint the first time you log in; it’ll be in the console output of the instance which you can see through the console (Actions… Get System Log) or an ec2-get-console-output command line.

- Patch the instance. The AMI you’re using may be more or less super old and a “sudo yum update” or similar is a really good idea.
- Turn off passworded login if it’s not already, and the ability to directly log in as root if it’s not already.
- If you’d like this to be your bastion host, then add other security groups for other instances to go to – don’t allow inbound SSH to them from anywhere, just from this security group.
Automate
The final step to doing all this securely is to not be making manual changes. Via the CLI or API you can automate a lot of this, but even better is using CloudFormation, maybe in conjunction with OpsWorks or another CM tool, to define in a readable config how you want your system to behave (VPCs, security groups, etc.) and instantiate off that. Nothing’s more auditable than a system that’s built automatically from a spec! You can cheat a little and set up your VPCs and all the way you want and use their CloudFormer tool to generate a CloudFormation template from your running system. Then you can edit that and tear down/restart from scratch.
The more you automate, the tighter you can make the security controls without inconveniencing yourself. A trivial example is you could have a script that uses the CLI to change the security group to allow SSH from wherever you are right now, and then close it afterwards – so there’s no SSH access from a location unless you allow it! In the same vein, allowing “all access” within a security group or from one group to another is usually done out of laziness and flexibility for manual changes – if you automate such that if you add a new set of servers, they also configure their connectivity needs specifically, you’re more secure. For defense in depth you could automatically configure the onboard firewalls on the boxes to mimic the security groups, just read the security group settings and transform into similar iptables (or whatever) settings. Voila, a HIPS. Pump those logs into Sumo too.
You could add tripwire or OSSEC for change detection, but also if you run your servers from trusted images and recreate them frequently, you can very much reduce the risk of compromise.
That’s my quick HOWTO on how to get servers running in a mode that’s likely way more secure than the average enterprise server unless you work for a bank or something, inside a couple hours. MFA, key based auth, all the network separation you could want, separation of privileges…